War of the roses
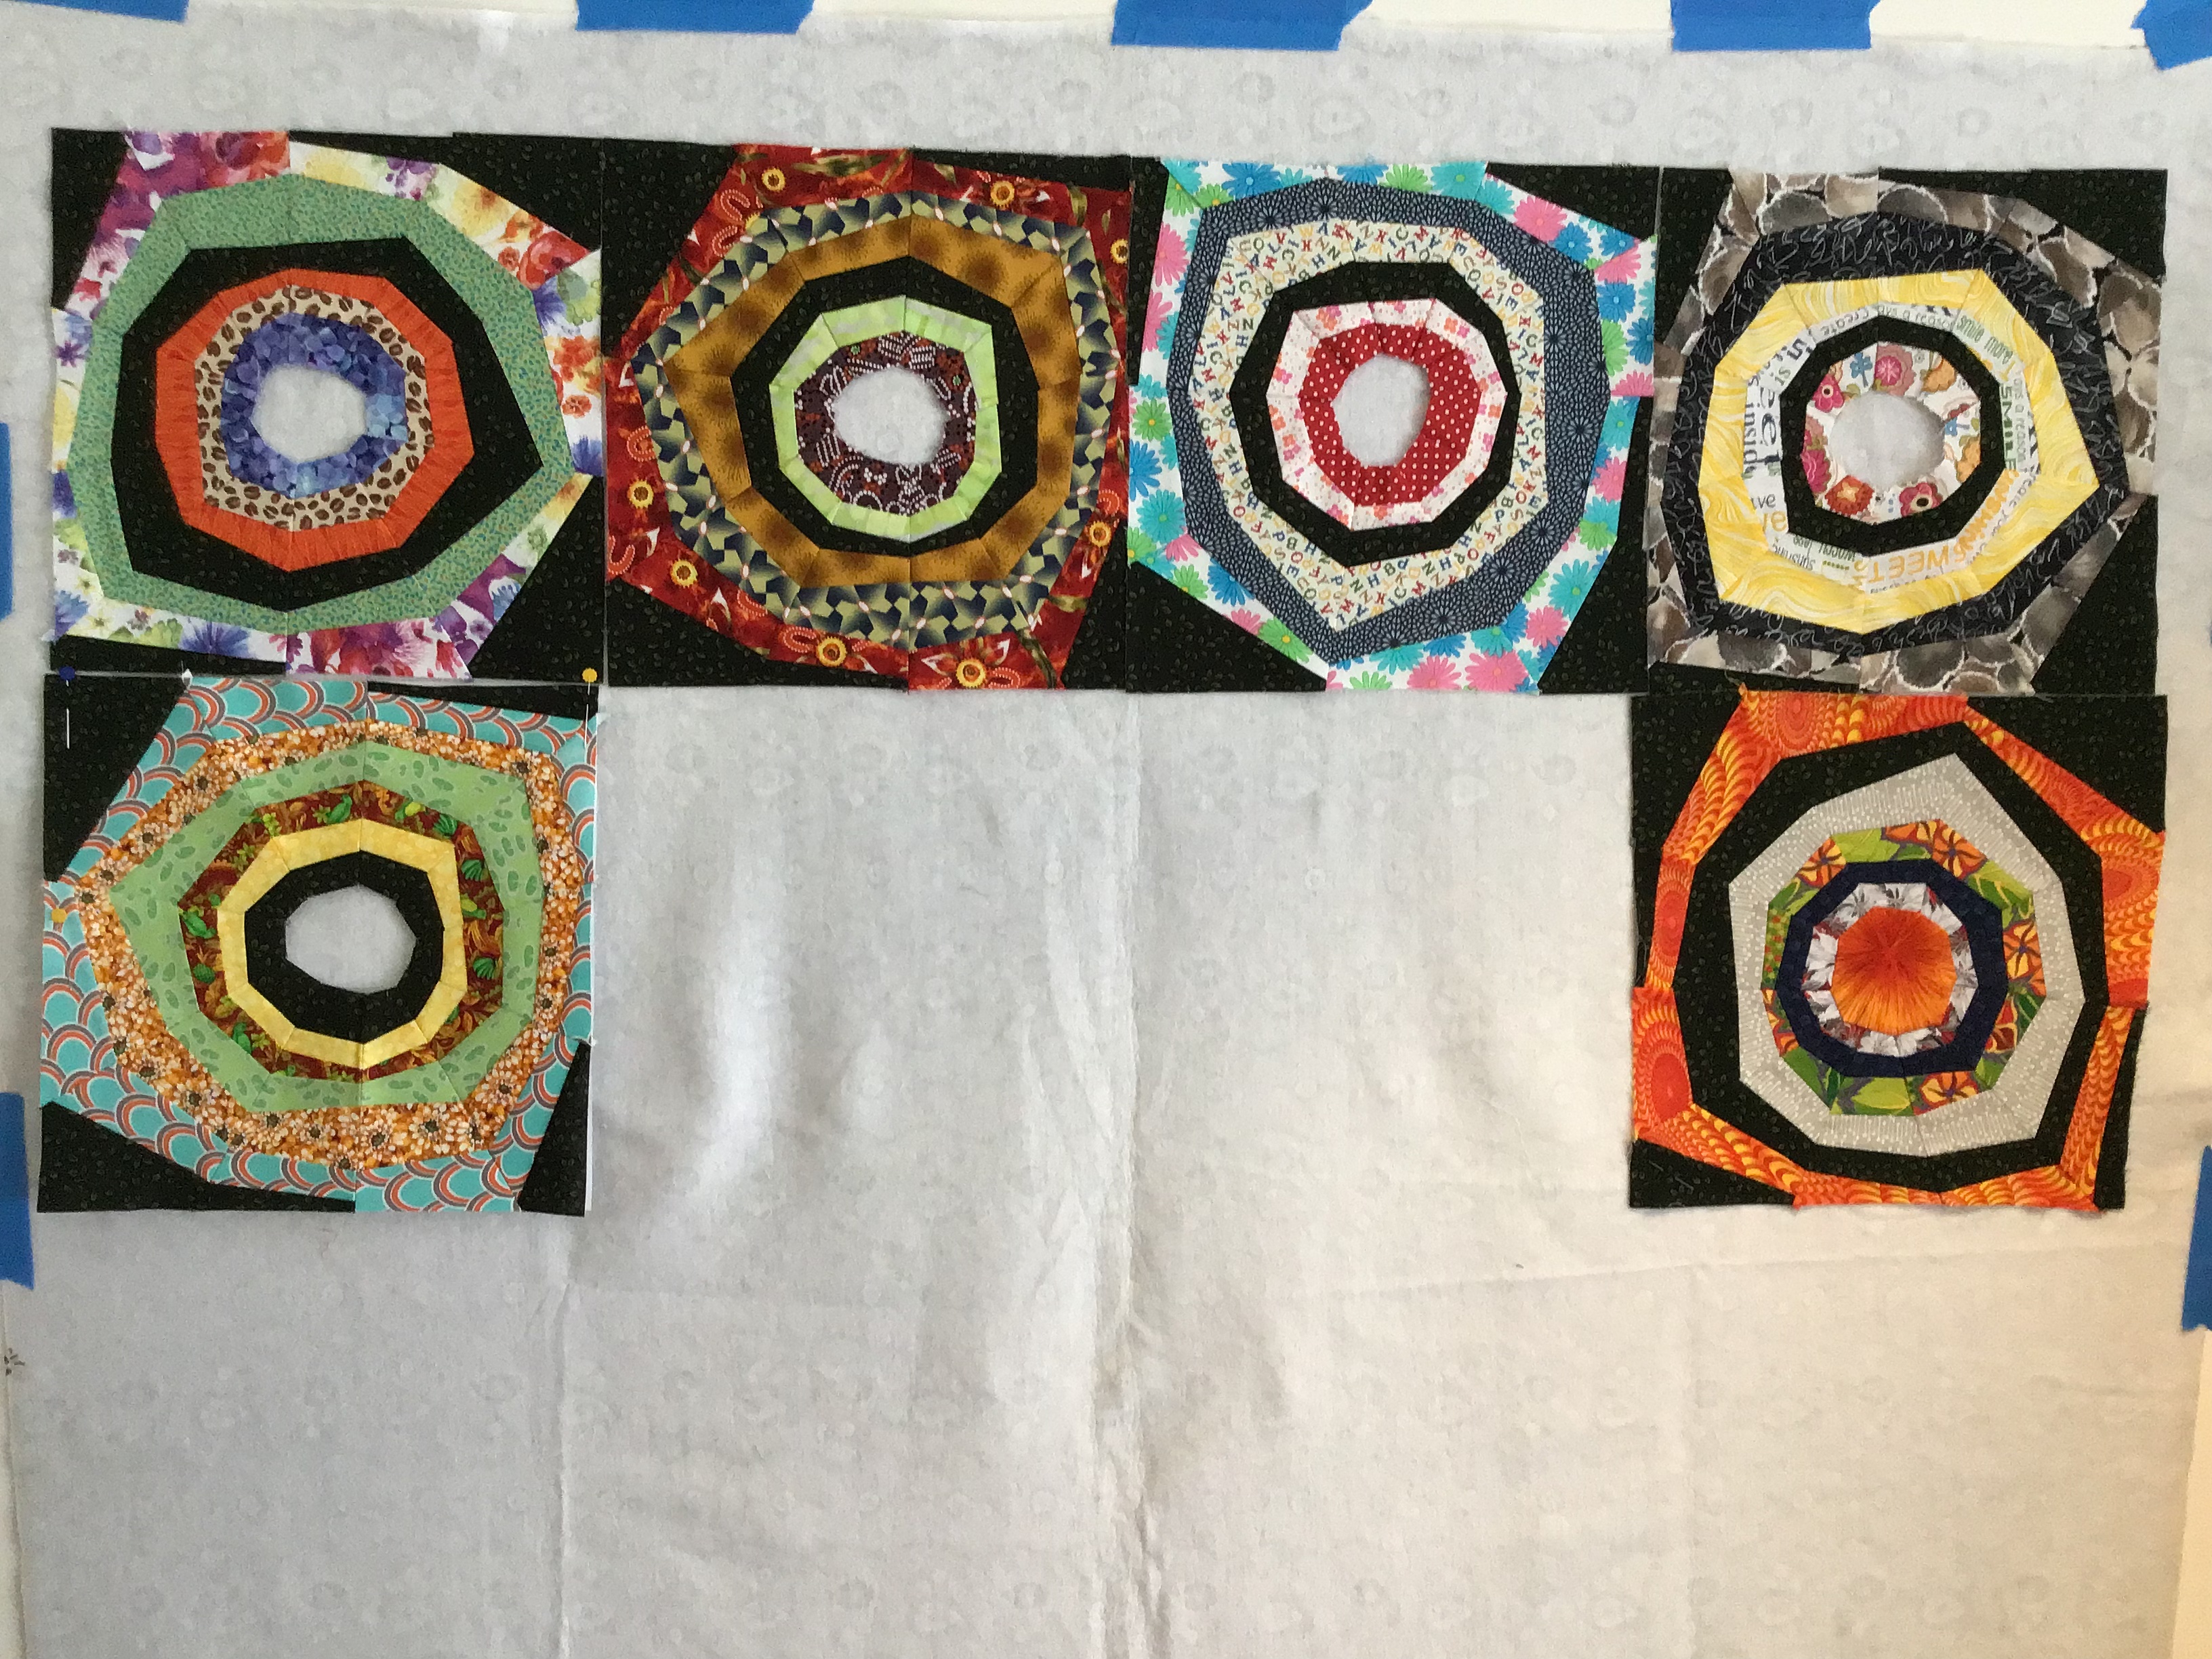
Thi is the sixth block I’ve made from the Stone Roses pattern that I bought a couple of weeks ago.

It’s the only block that is actually the right size and all squared up. Here’s why:

So what happened? Well, five blocks in I became convinced that the pattern was wrong. How can you make a foundation pieced block and have each one differ in size?
I checked my seams. I checked the stitch length. I tried both quilting feet on my Bernina. Although the pattern didn’t specify this, I also lightly pressed each alternate wedge so that seams nested. Nothing worked.
I became convinced that the pattern was wrong. So I printed off a set of foundation papers and taped them together.

They fitted exactly. Hmmm. The problem had to be my piecing. Since each wedge is foundation pieced, the problem has to be with joining the wedges together - hence baggy middles and uneven sides.
I had been removing the foundation paper before joining the wedges together. The pattern isn’t clear on whether or not to do this.
So on the 6th block I decided to keep the foundation paper on each wedge and sew through both sets with an even smaller stitch length. This also means the seams are not nested.
But it works!
There are a couple of problems with the instructions on this pattern. First, as I said in my last post, neither the unfinished nor the finished block measurements are given. The pattern says the quilt is 56 inches square. It can’t be because the unfinished block is 13.5 inches square meaning the finished block is 13 inches square.
So the finished quilt, which doesn’t have a border, is actually 52 inches square.
Second, while the instructions for the quilt give directions on the amount of fabric required if the quilt is made from 15 fabrics, it doesn’t tell you the size to cut each rectangle of fabric. I’ve learned through trial and error and lots of swearing under my breath! Of course, I recognise that it’s almost impossible for a designer to estimate the measurement of fabric required to complete a quilt. However, a simple note about the dimensions of fabric required for each round in the wedge is not a huge step to take. I will share my cutting requirements in my next post just to help out anyone that wants to make the same kind of scrappy Stone Roses.
I use my smallest scraps for the first and second rings. After that I sort through bigger scraps, and stash, to cut the other rectangles. Then I cut 10 rectangles from each piece of fabric before taking them to the sewing machine and sewing one individual block. This means that I can assess colours and combination of colours. I naturally gravitate towards brights. And I can already see that I need more reds and blues.
Early on I decided to use that gorgeous forest green leftover from the quilt I made for my friend, Belinda. Then I decided to use the forest green background on one inner ring on each block to tie each block together amidst all the different fabrics. Be warned: the amount of wastage can be extreme. I think I will need to buy more forest green, and I intended to buy no new fabric for this quilt.
I am saving all scraps that are 1.5 inches square/wide for my Square Dance quilt. I’m not looking forward to all the rotary cutting, but hey, once that’s done I can throw out crumbs without any guilt!
I’m so happy with how this quilt is developing.
It’s slow going though. Each block takes me about 5 hours, and I haven’t done the centres yet!
I found a great tip for ‘finger pressing seams’ on Karen Brown’s Just Get it Done website. I bought myself a wallpaper seamer from Bunnings. It cost about $8 and I think it is the best tool I have ever bought for quilt making. No more finger pressing. I just roll the roller over the seam. It works like magic and each seam has a very crisp edge.

I also followed Karen’s tip for a temporary design ‘board’. It works brilliantly and I don’t have to worry about holes in the wall. Karen has several ideas to create temporary design walls, and once this quilt is finished I’ll be trying another temporary design that is a bit more sturdy. My design wall is made from a piece of fleece that I found in a discount bin at my local quilt shop. It will be re-used in the next version of a temporary design wall. No holes in walls. Thanks Karen! I love your ‘tips and tricks’.
Have a great week everyone!


Wow, such a great quilt in progress!! Although it should be correct in the pattern, great that you could figure out all the deets yourself!
ReplyDeleteI don't know why designers won't list the size of blocks or what pieces should measure after being sewn together. It's so frustrating when that happens. Good for you figuring out what the problem was. I look forward to seeing more blocks, happy stitching!
ReplyDelete